Eliza Wright
![]() Hints and Tips
Hints and Tips
![]() Silk Shading
Silk Shading
![]() Stage One
Stage One
I'm now going to take you through the working of this design, but a lot of what I say can be applied to any silk shading landscape, including the very easy one that was pictured under 'Getting Started'.
An important thing to remember when doing silk shading is that the order of working is quite important. Usually, you must work from the top down, in rows. So we begin with the sky, and start by working a line of split stitch, in an appropriate colour, right across the top of the picture. Strictly speaking this is not necessary for the sky, but I've found that it's all too easy to drift when you're stitching the first line of long and short stitch, and so I work this line of stitching to keep me straight.
The sky in this picture is quite complicated and there are several shade changes. This you have to do by eye, since the sky is so light that it is not really practical to mark the areas with paint. Also, the areas of shading do not have to be followed exactly.
So begin with the first row of long and short stitch, using one strand of thread and a size 10 embroidery needle, and changing the colour if and when necessary. Remember that 'long and short' stitch is a bit of an over-simplification. 'Long, short and somewhere in between' stitch might be better! What you must avoid is having your long stitches all the same length, and your short stitches all the same too. This will result in 'stripes', which mostly we do not want, although they are sometimes appropriate.
For the first row, your needle should come up within the design, and the stitch goes up and over the line of split stitching. This applies to every case where you're stitching over a split stitch line.
The next and subsequent rows go the other way round, as the needle comes up in the row of stitching that already exists, then moves down. Precisely where it comes up is for you to decide. If we were using two strands of thread, it would come up between the strands. But we only have one. Most people, I think, bring the needle up beside or between the strands of the previous row. But I bring the needle up in the strand, and split it (just like split stitch with one strand). The two methods look a little different.
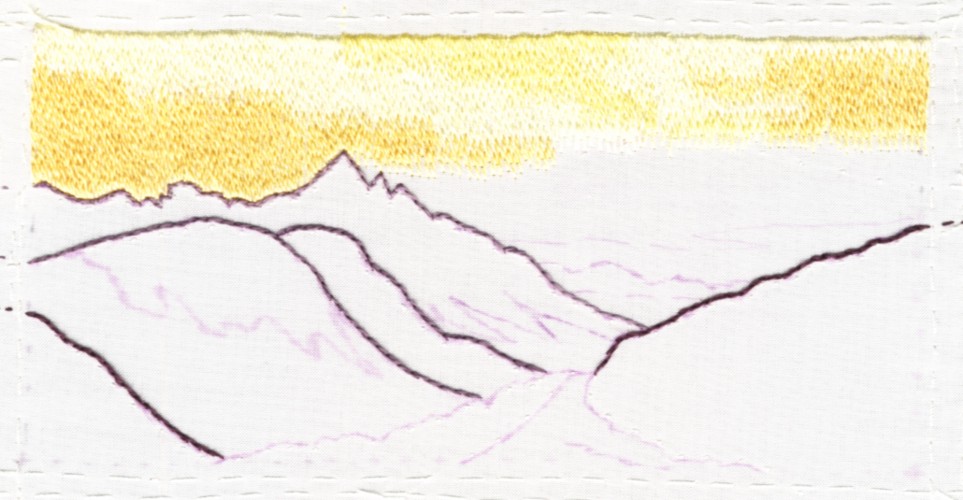
For light relief while you're working the sky, you can take a break and work the split stitch on the mountains and foreground. You should have the horizon split stitch finished by the time the sky gets down to it. Also you should finish stitching the sky before beginning on the mountains. Note that there is no split stitch on the very distant hills, as I did not want them to be too well defined.
The picture below shows Pinnacle Ridge with part of the sky complete, and the split stitch worked on the mountains.
See Also: Eliza Wright homepage | How to do Silk Shading | Mixed Media Gallery | Silk Shading Gallery | For Sale Gallery
Copyright © 1998-2012 Eliza Wright, Isle of Skye , Cross Stitch Designs